Accordion Settings
Drop down “Accordion Headings” functionality on Connexions Microsite
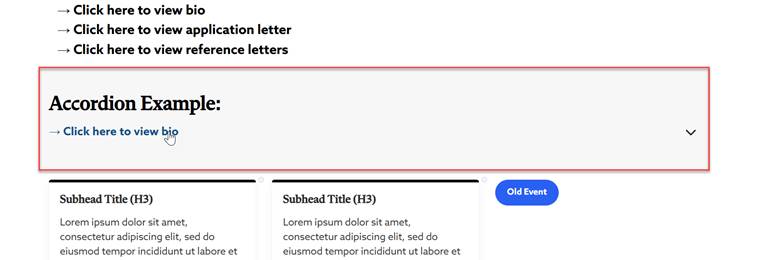
To achieve the below result with the drop-down functionality "Accordion Headings"
The Design Services Team has already created a microsite template, our custom-built accordions are already set up on site!
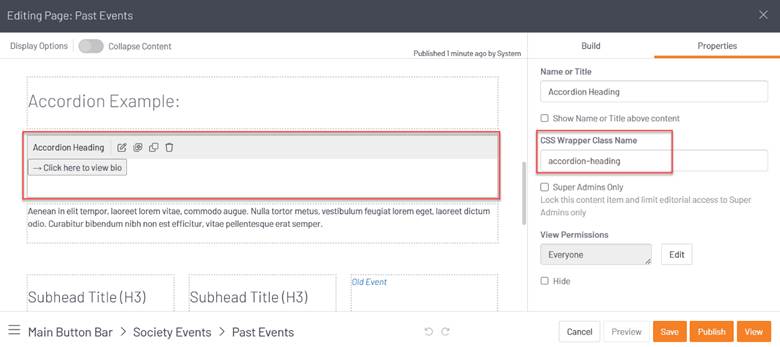
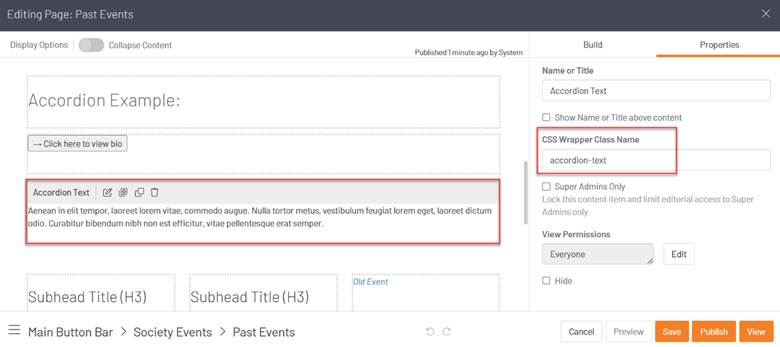
If you edit the page, then you will see how the accordions are set up. First, you have the "accordion-heading" HTML widget followed by the "accordion-text" HTML widget. Each accordion must follow this pattern in order for the accordion to work correctly!
Here is a screenshot of the "accordion-heading" HTML widget:
Here is a screenshot of the "accordion-text" HTML widget:
There is an alternate way to add the according settings to the body text as follows:
To build the markup for an HTML accordion, use the <details> element. Use a <summary> tag to provide the title for the accordion. Add your content, and you're done!

HTML code:
<details>
<summary>Section title</summary>
<p>Here is the content!</p>
</details>